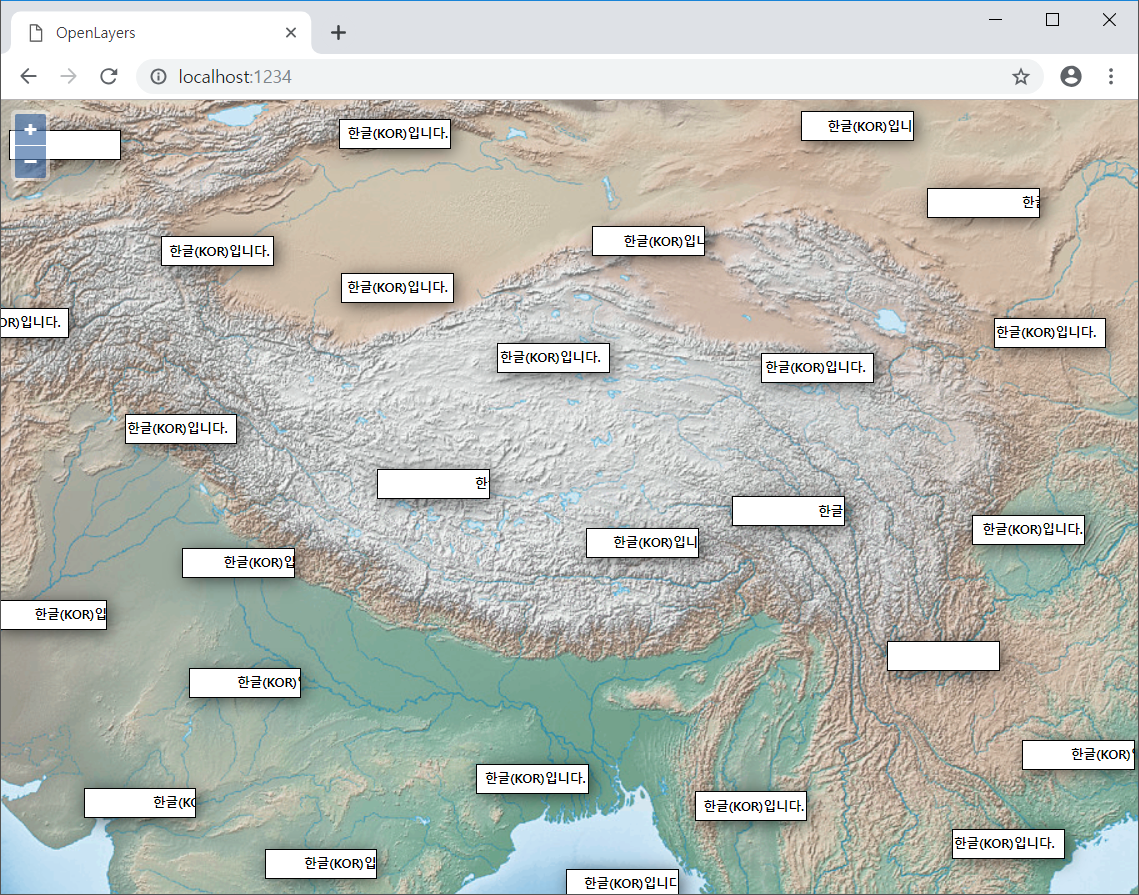
map의 sinlgeclick 이벤트를 등록하고, 실행되는 코드를 다음처럼 지정합니다.
import Overlay from 'ol/Overlay.js';

map.on('singleclick', function(evt) {
    let container = document.createElement('div');
    container.classList.add('ol-popup-custom');

    let content = document.createElement('div');
    content.classList.add('popup-content');

    container.appendChild(content);
    document.body.appendChild(container);

    var coordinate = evt.coordinate; // 클릭한 지도 좌표
    content.innerHTML = '' + '한글(KOR)입니다.' + '';

    var overlay = new Overlay({
        element: container,
        //autoPan: true,
        //autoPanAnimation: {
        //  duration: 250
        //}
      });

    map.addOverlay(overlay);

    overlay.setPosition(coordinate);
});
참고로 위의 코드에 언급된 CSS에 대한 코드는 다음과 같습니다.
.ol-popup-custom {
    padding: 0;
    margin: 0;
    pointer-events: none;
    position: absolute;
    background-color: white;
    filter: drop-shadow(3px 3px 7px rgba(0,0,0,0.6));
    border: 1px solid black;
    width: 90px;
    left: -45px; /* 위치를 조정, -width의 절반값 */
    height: 24px;
    bottom: -12px; /* 위치를 조정, -height의 절반값 */
    box-sizing: border-box;
    overflow: hidden;
}

.popup-content {
   position: relative;
   animation-duration: 1s;
   animation-name: slidein;
   animation-direction: alternate;
   animation-iteration-count: infinite;
   box-sizing: border-box;
   line-height: 100%;
}

.popup-content > span {
    display: inline-block;
    line-height: 100%;
    width: 100%;
    font-size:10px;
    font-weight: bold;
    box-sizing: border-box;
}

@keyframes slidein {
    from {
        left: 90px;
    }

    to {
        left: 0px;
    }
}
실행하고 지도를 클릭해 보면, 아래처럼 클릭한 지점에 Overlay 정보가 표시되는 것을 볼 수 있습니다.

