웹브라우저의 기능 중 Ctrl + Plus나 Ctrl + Minus를 누르면 화면이 커지거나 작아집니다. 즉 화면의 확대, 축소 기능인데요. 이 Zoom 값을 얻는 JS 코드입니다.
const zoom = (window.outerWidth / window.innerWidth);
위의 zoom 값은 비율이고 % 값을 원한다면 100을 곱해주면 됩니다. 마우스로 어떤 UI를 드래그 해서 이동 시킬때 꼭 반영해 줘야 할 Zoom 값입니다.

공간정보시스템 / 3차원 시각화 / 딥러닝 기반 기술 연구소 @지오서비스(GEOSERVICE)
웹브라우저의 기능 중 Ctrl + Plus나 Ctrl + Minus를 누르면 화면이 커지거나 작아집니다. 즉 화면의 확대, 축소 기능인데요. 이 Zoom 값을 얻는 JS 코드입니다.
const zoom = (window.outerWidth / window.innerWidth);
위의 zoom 값은 비율이고 % 값을 원한다면 100을 곱해주면 됩니다. 마우스로 어떤 UI를 드래그 해서 이동 시킬때 꼭 반영해 줘야 할 Zoom 값입니다.
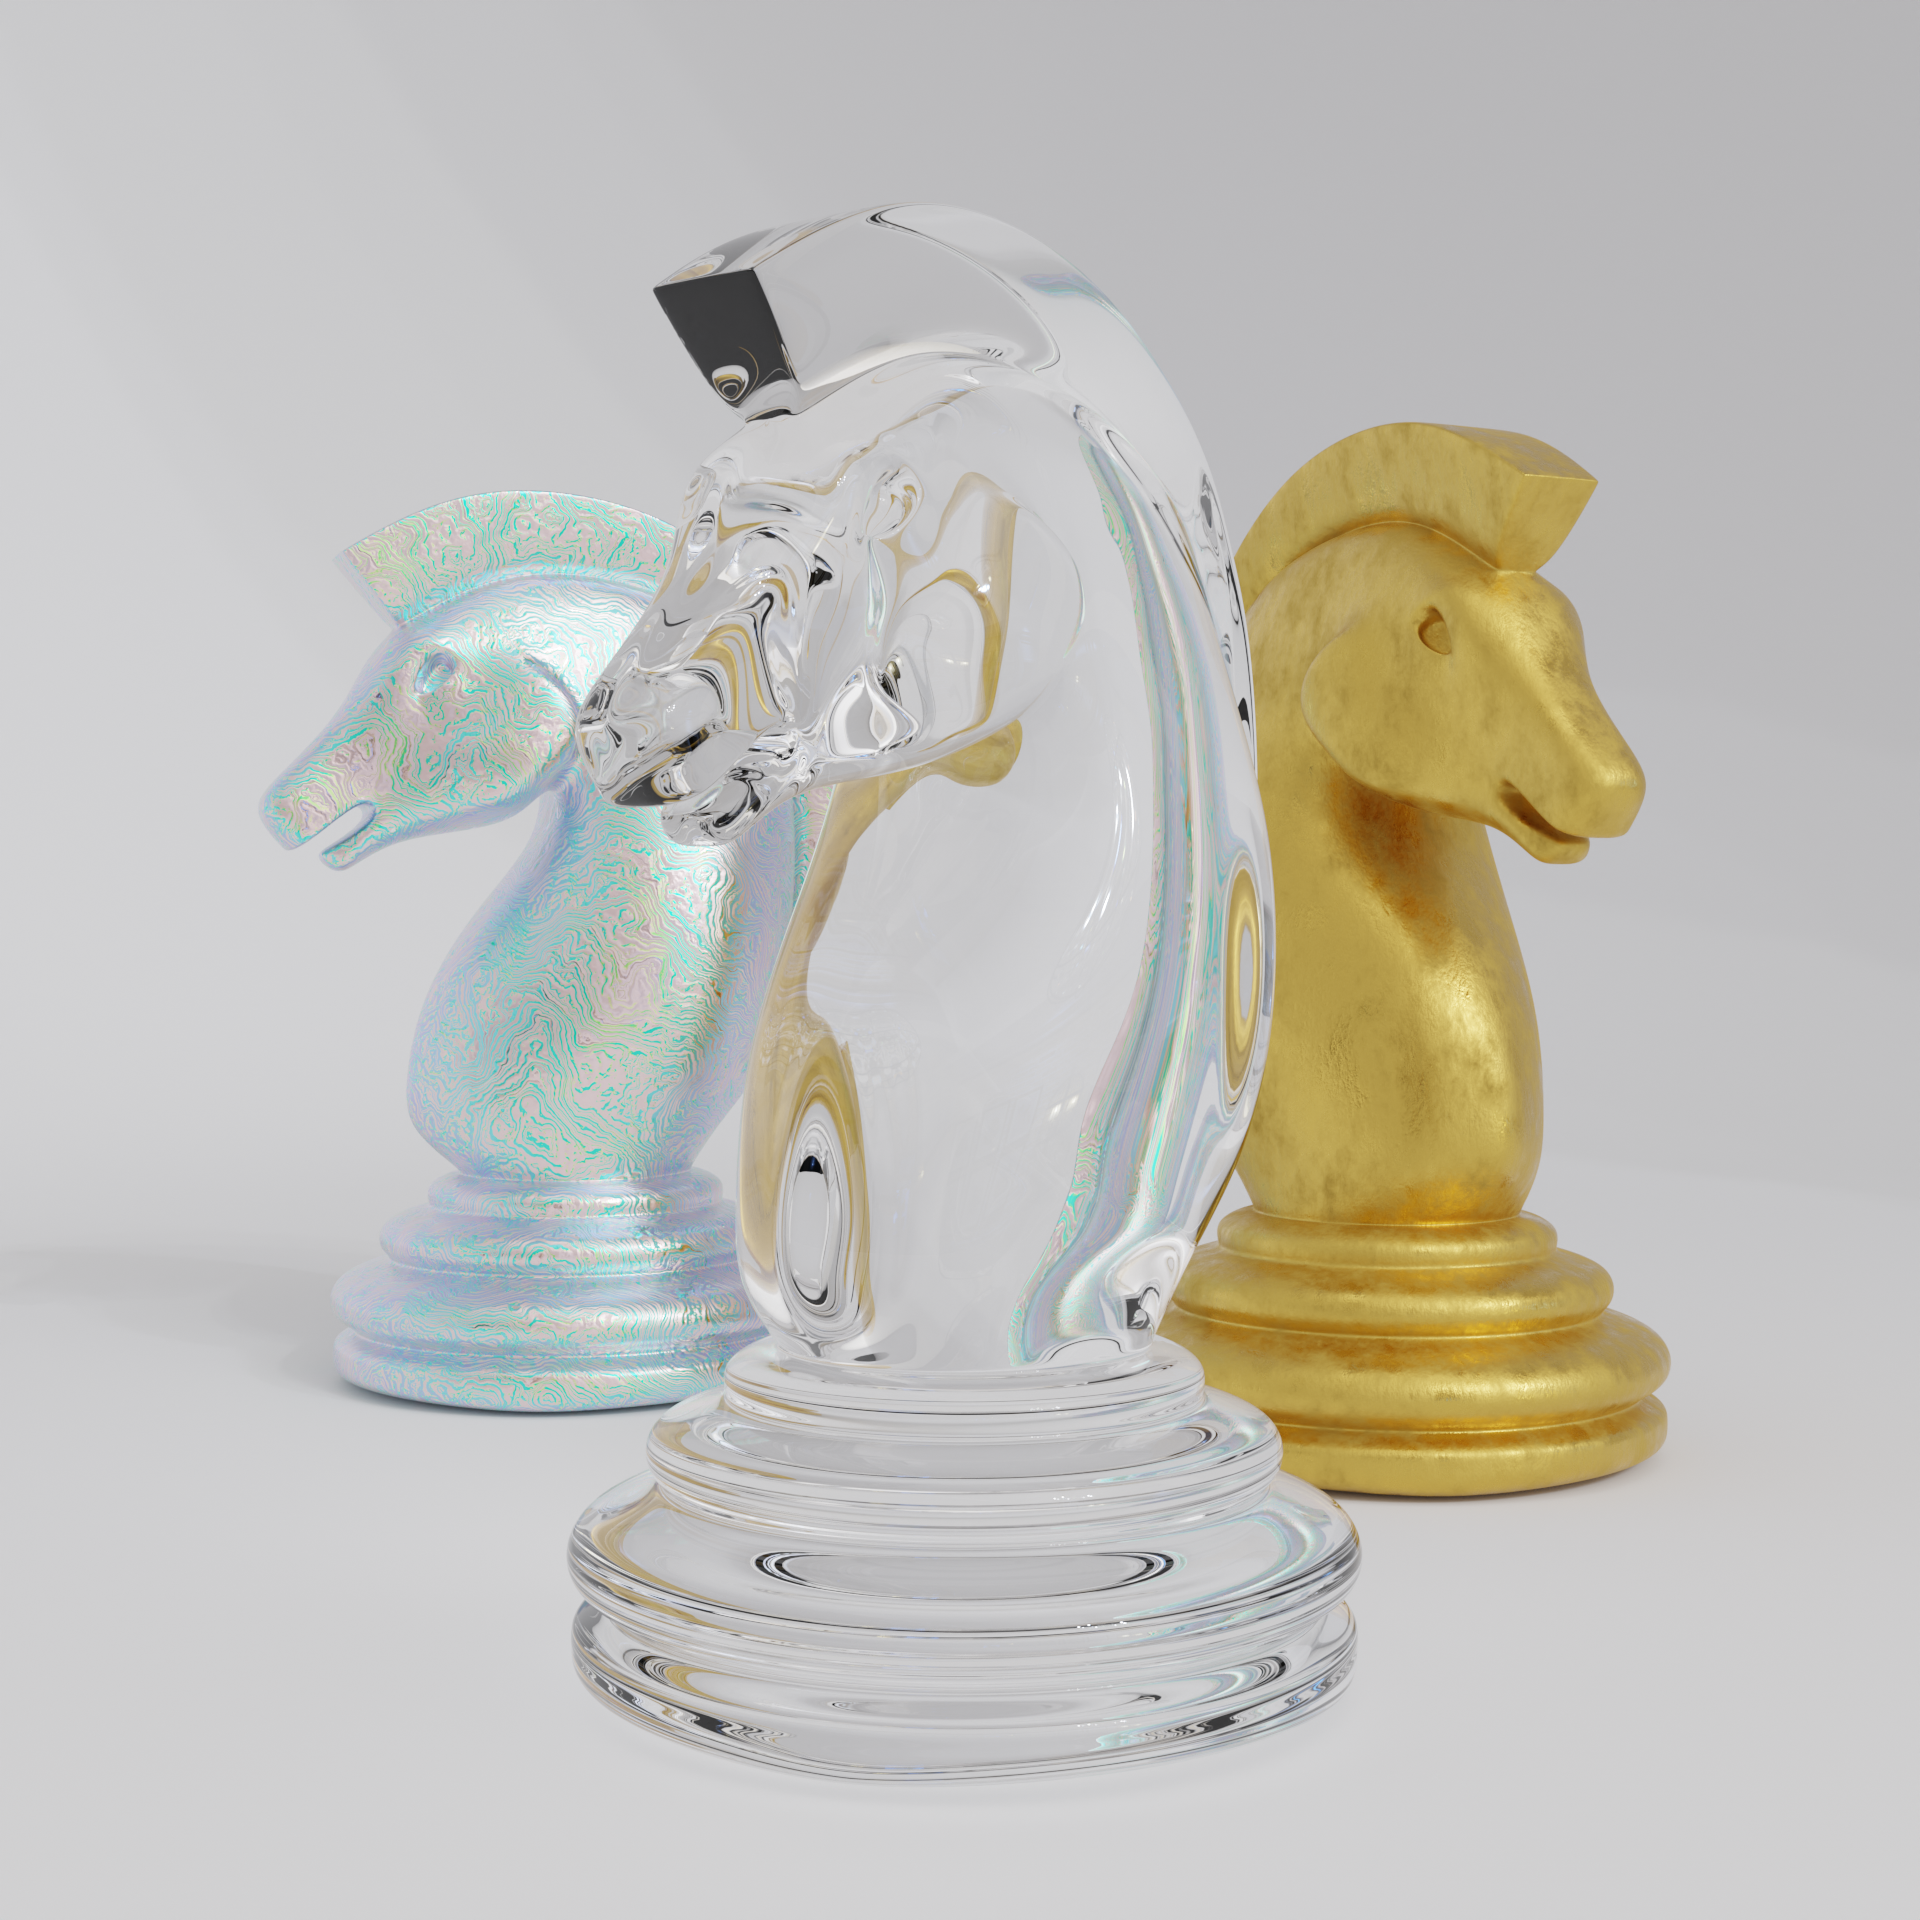
체스 보드에 놓여진 말 중 하나를 정해 모델링해 봅니다. 워낙 간단한 모델인지라 모델링은 몇분 걸리지 않는데.. 재질을 만드는데 상대적으로 더 많은 시간이 소요되었습니다.
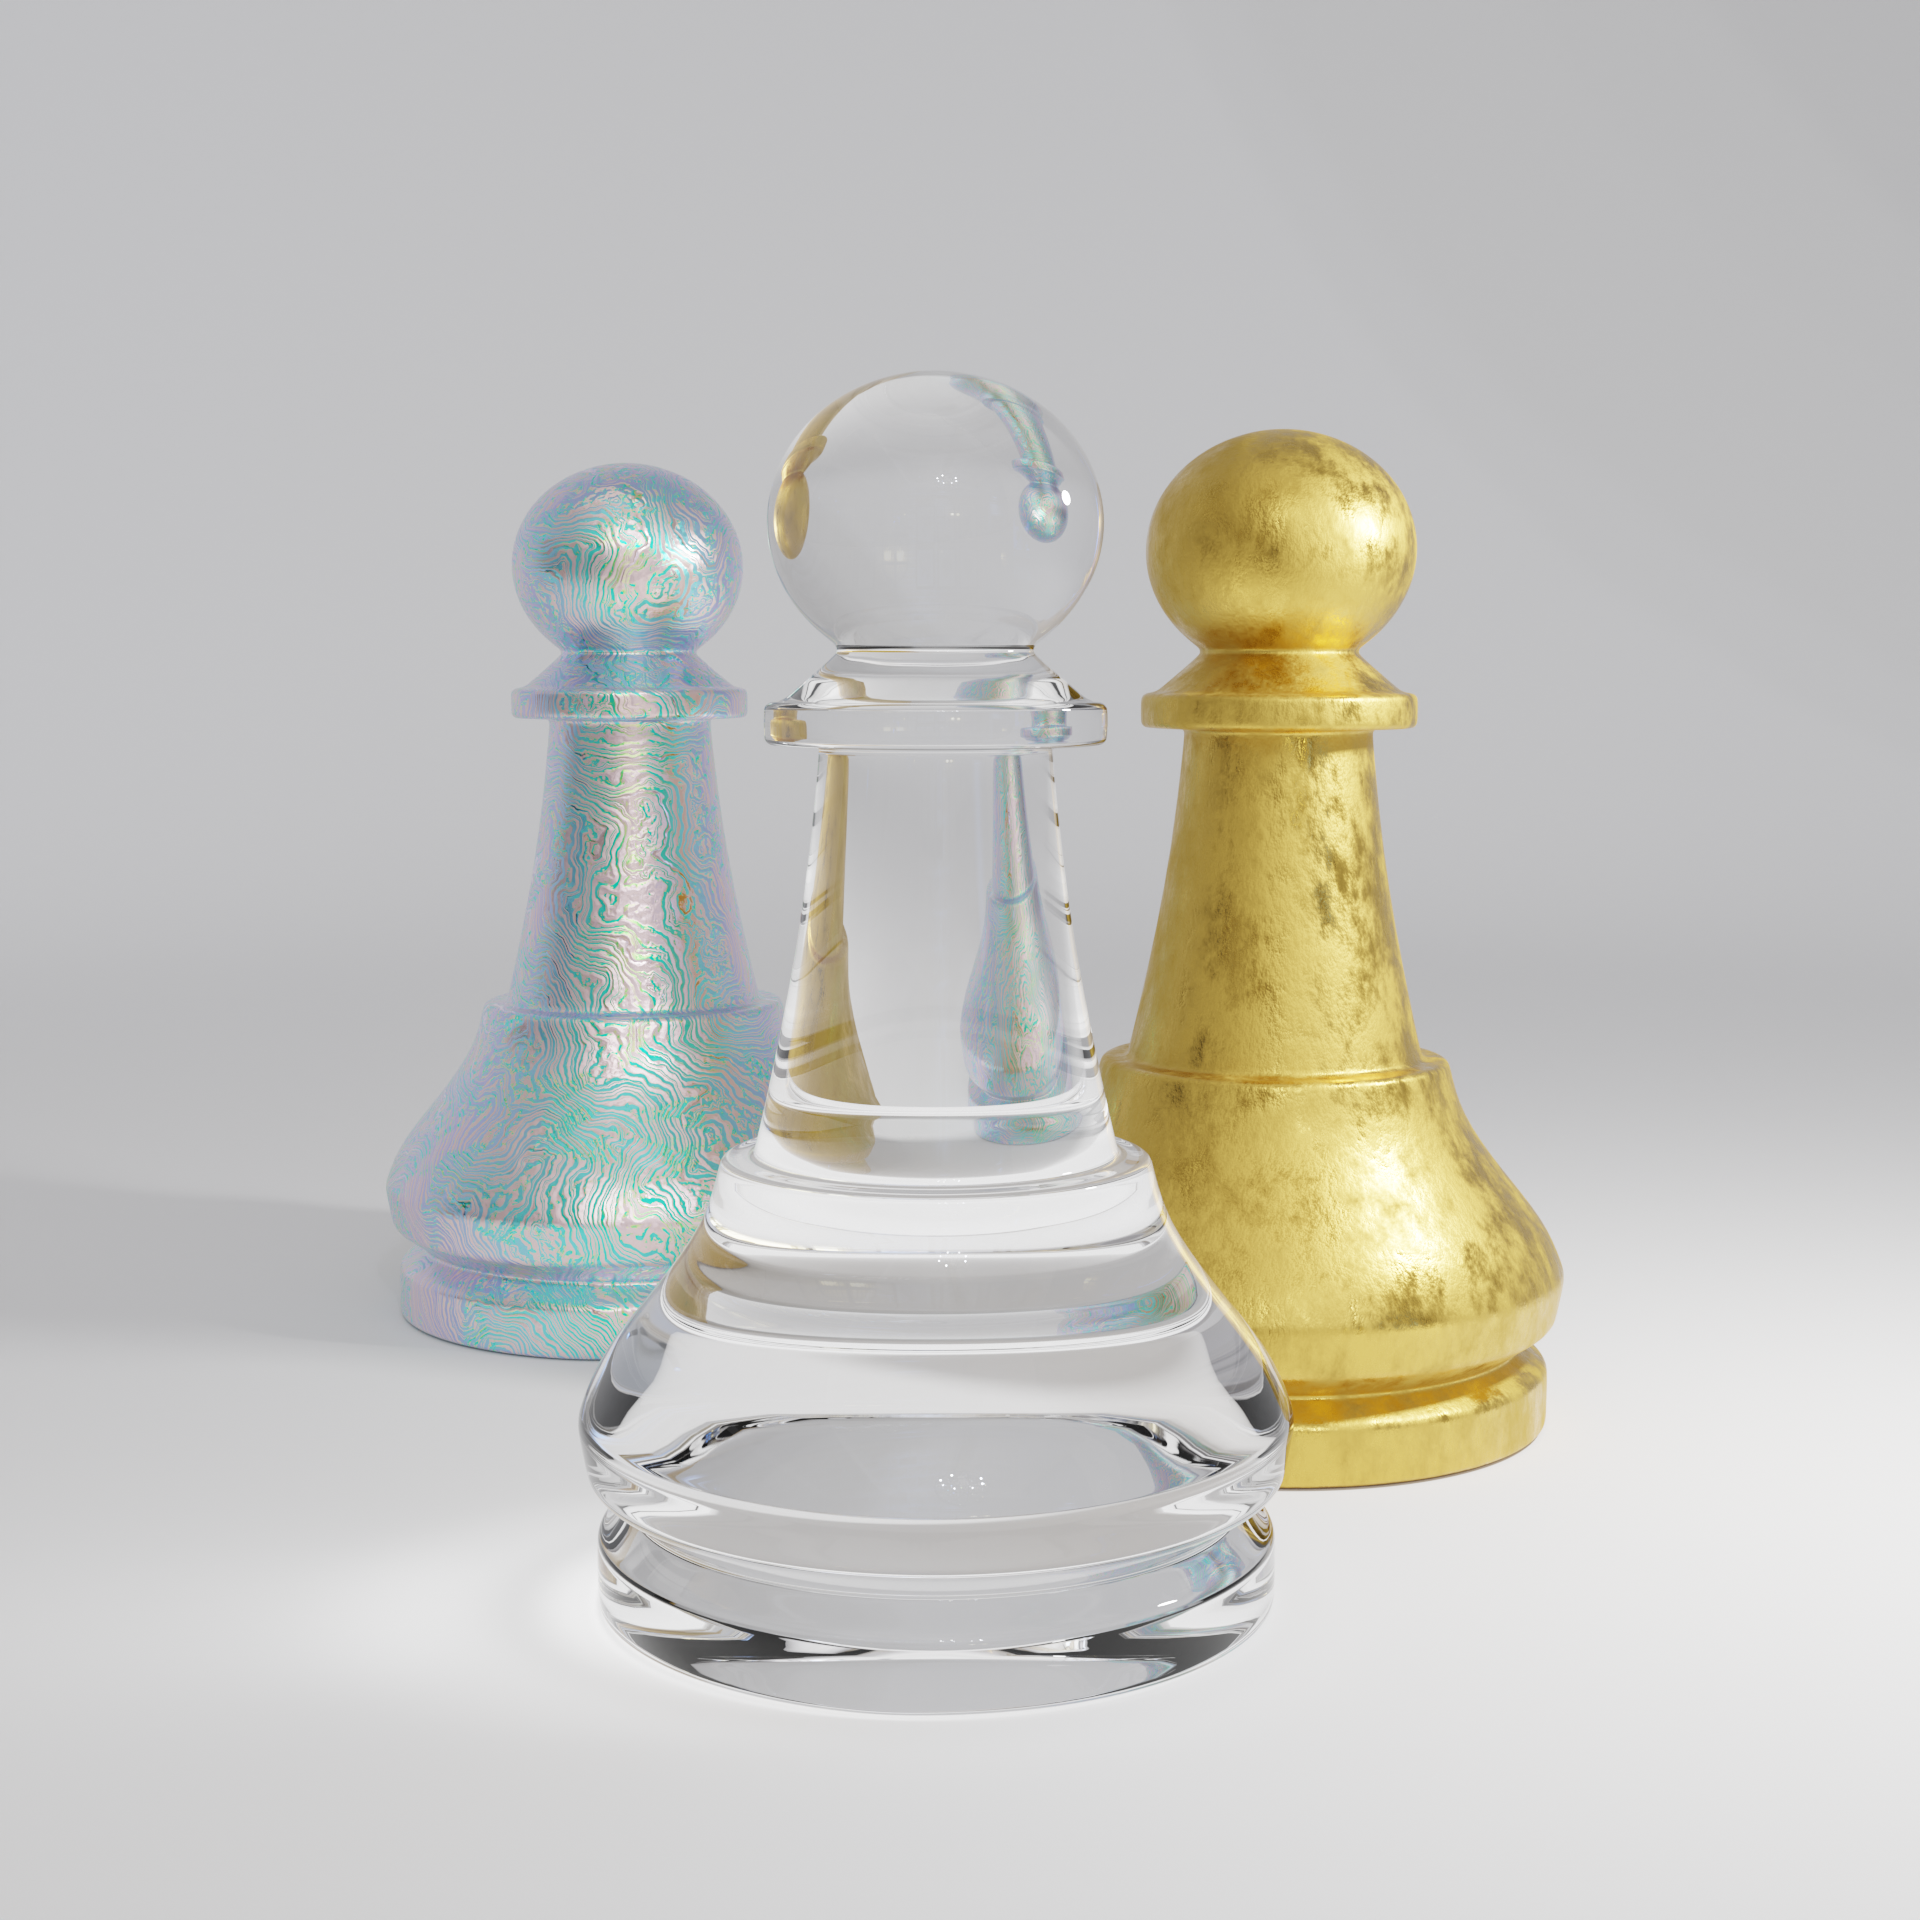
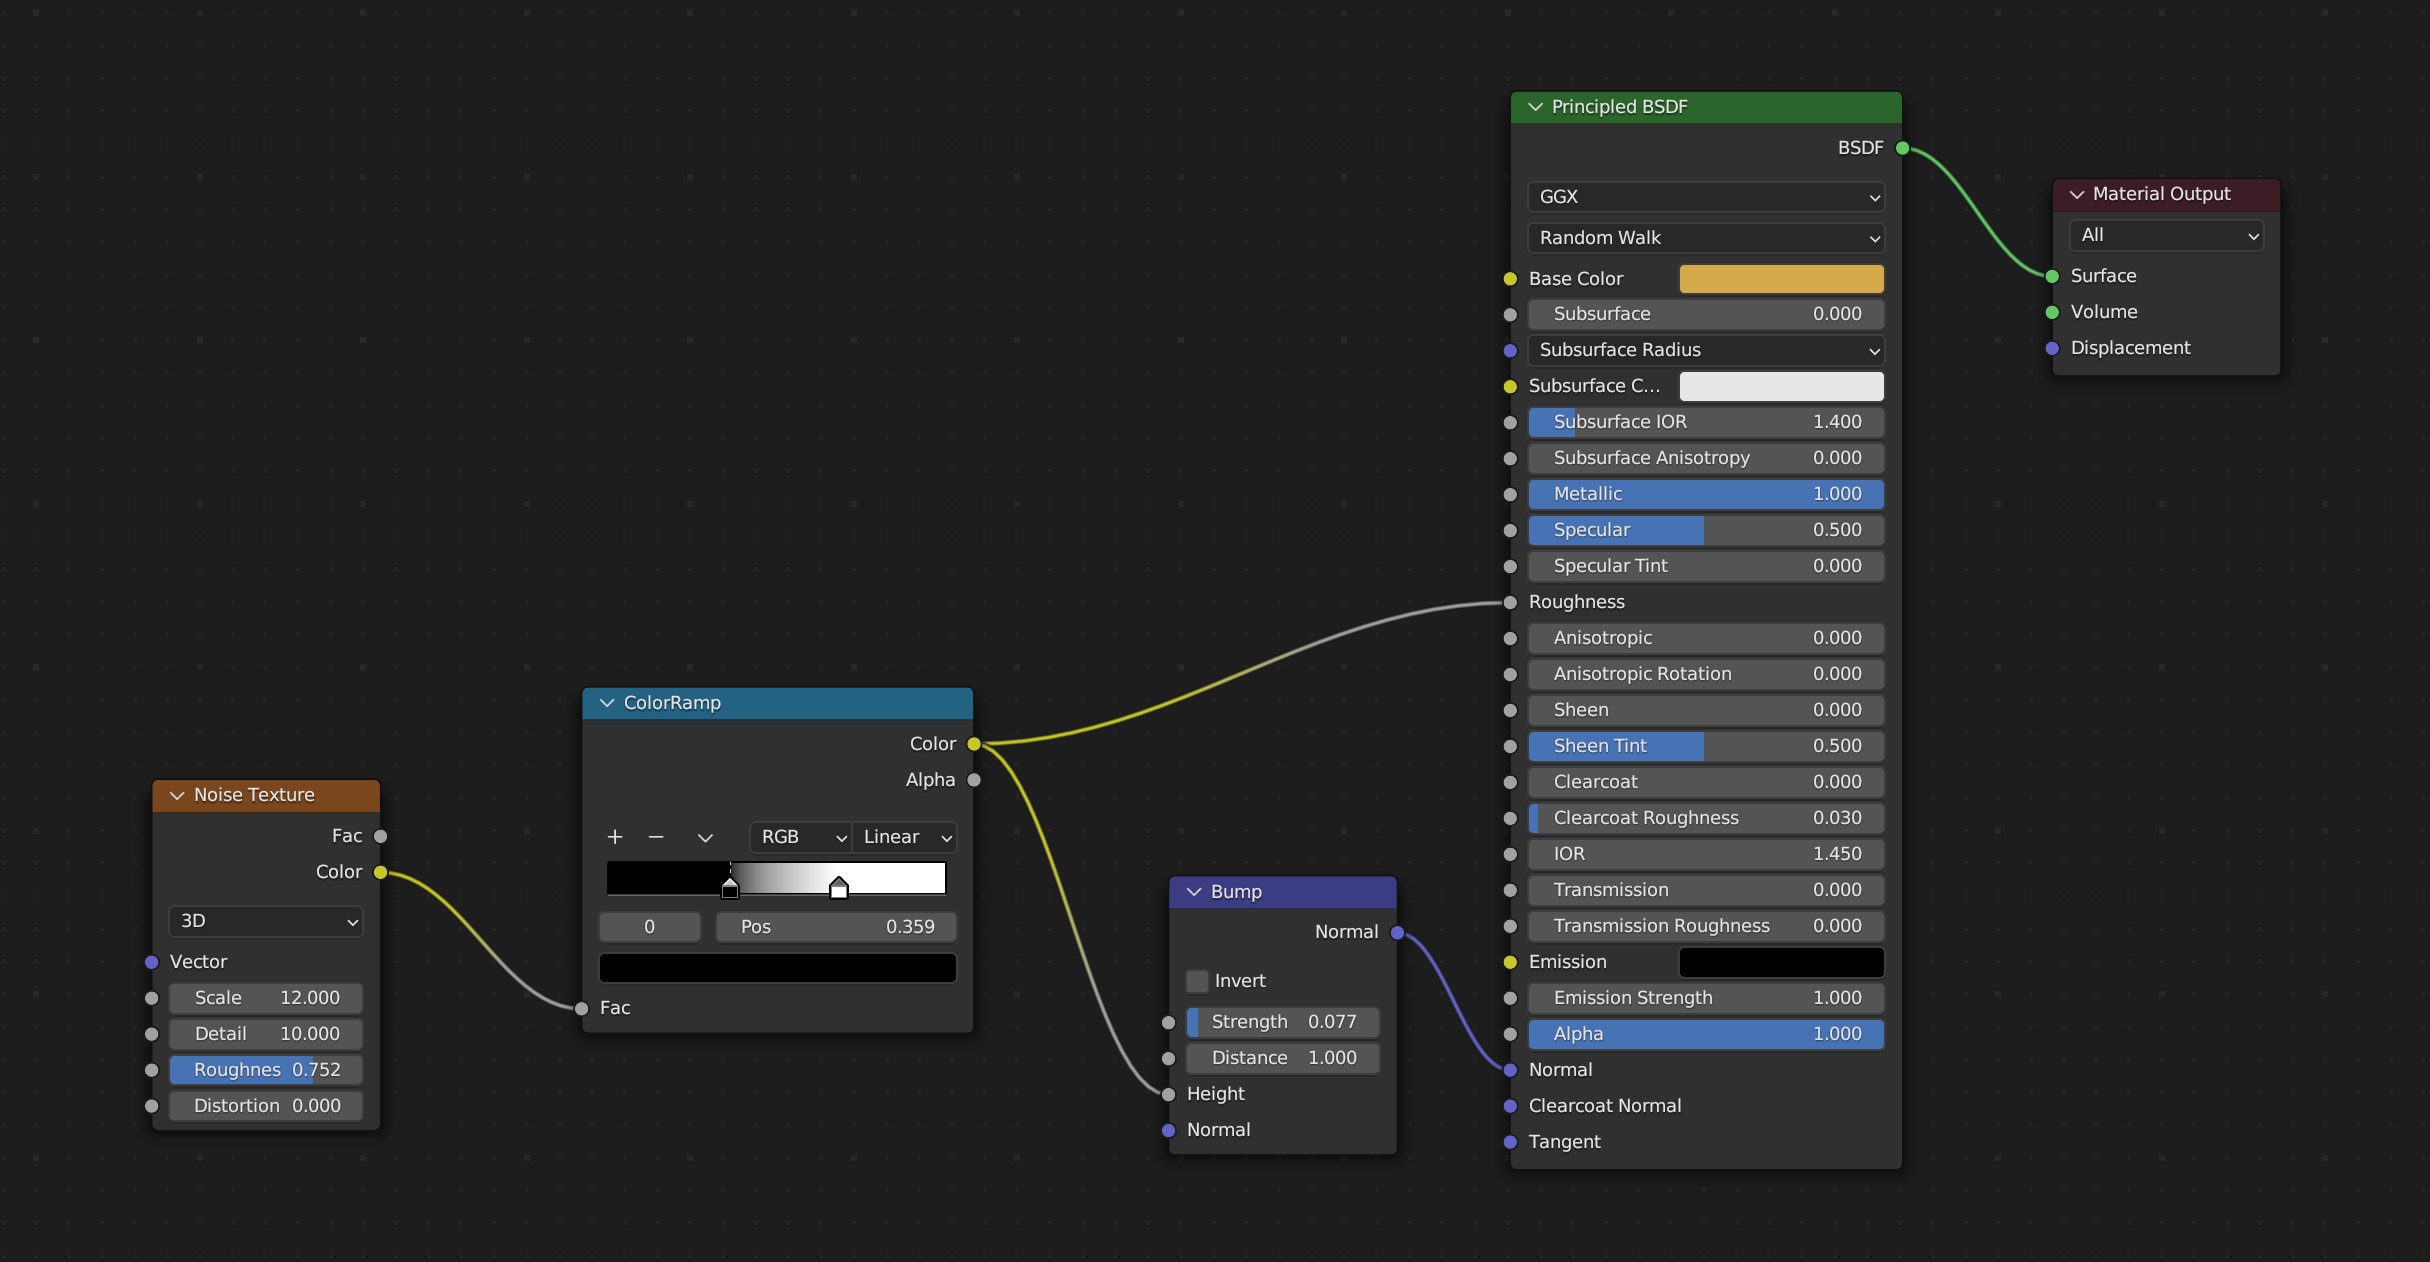
하나의 체스 모델에 대해 3개의 재질이 보이는데, 유리를 제외하고.. 먼저 금 재질은 다음과 같습니다.
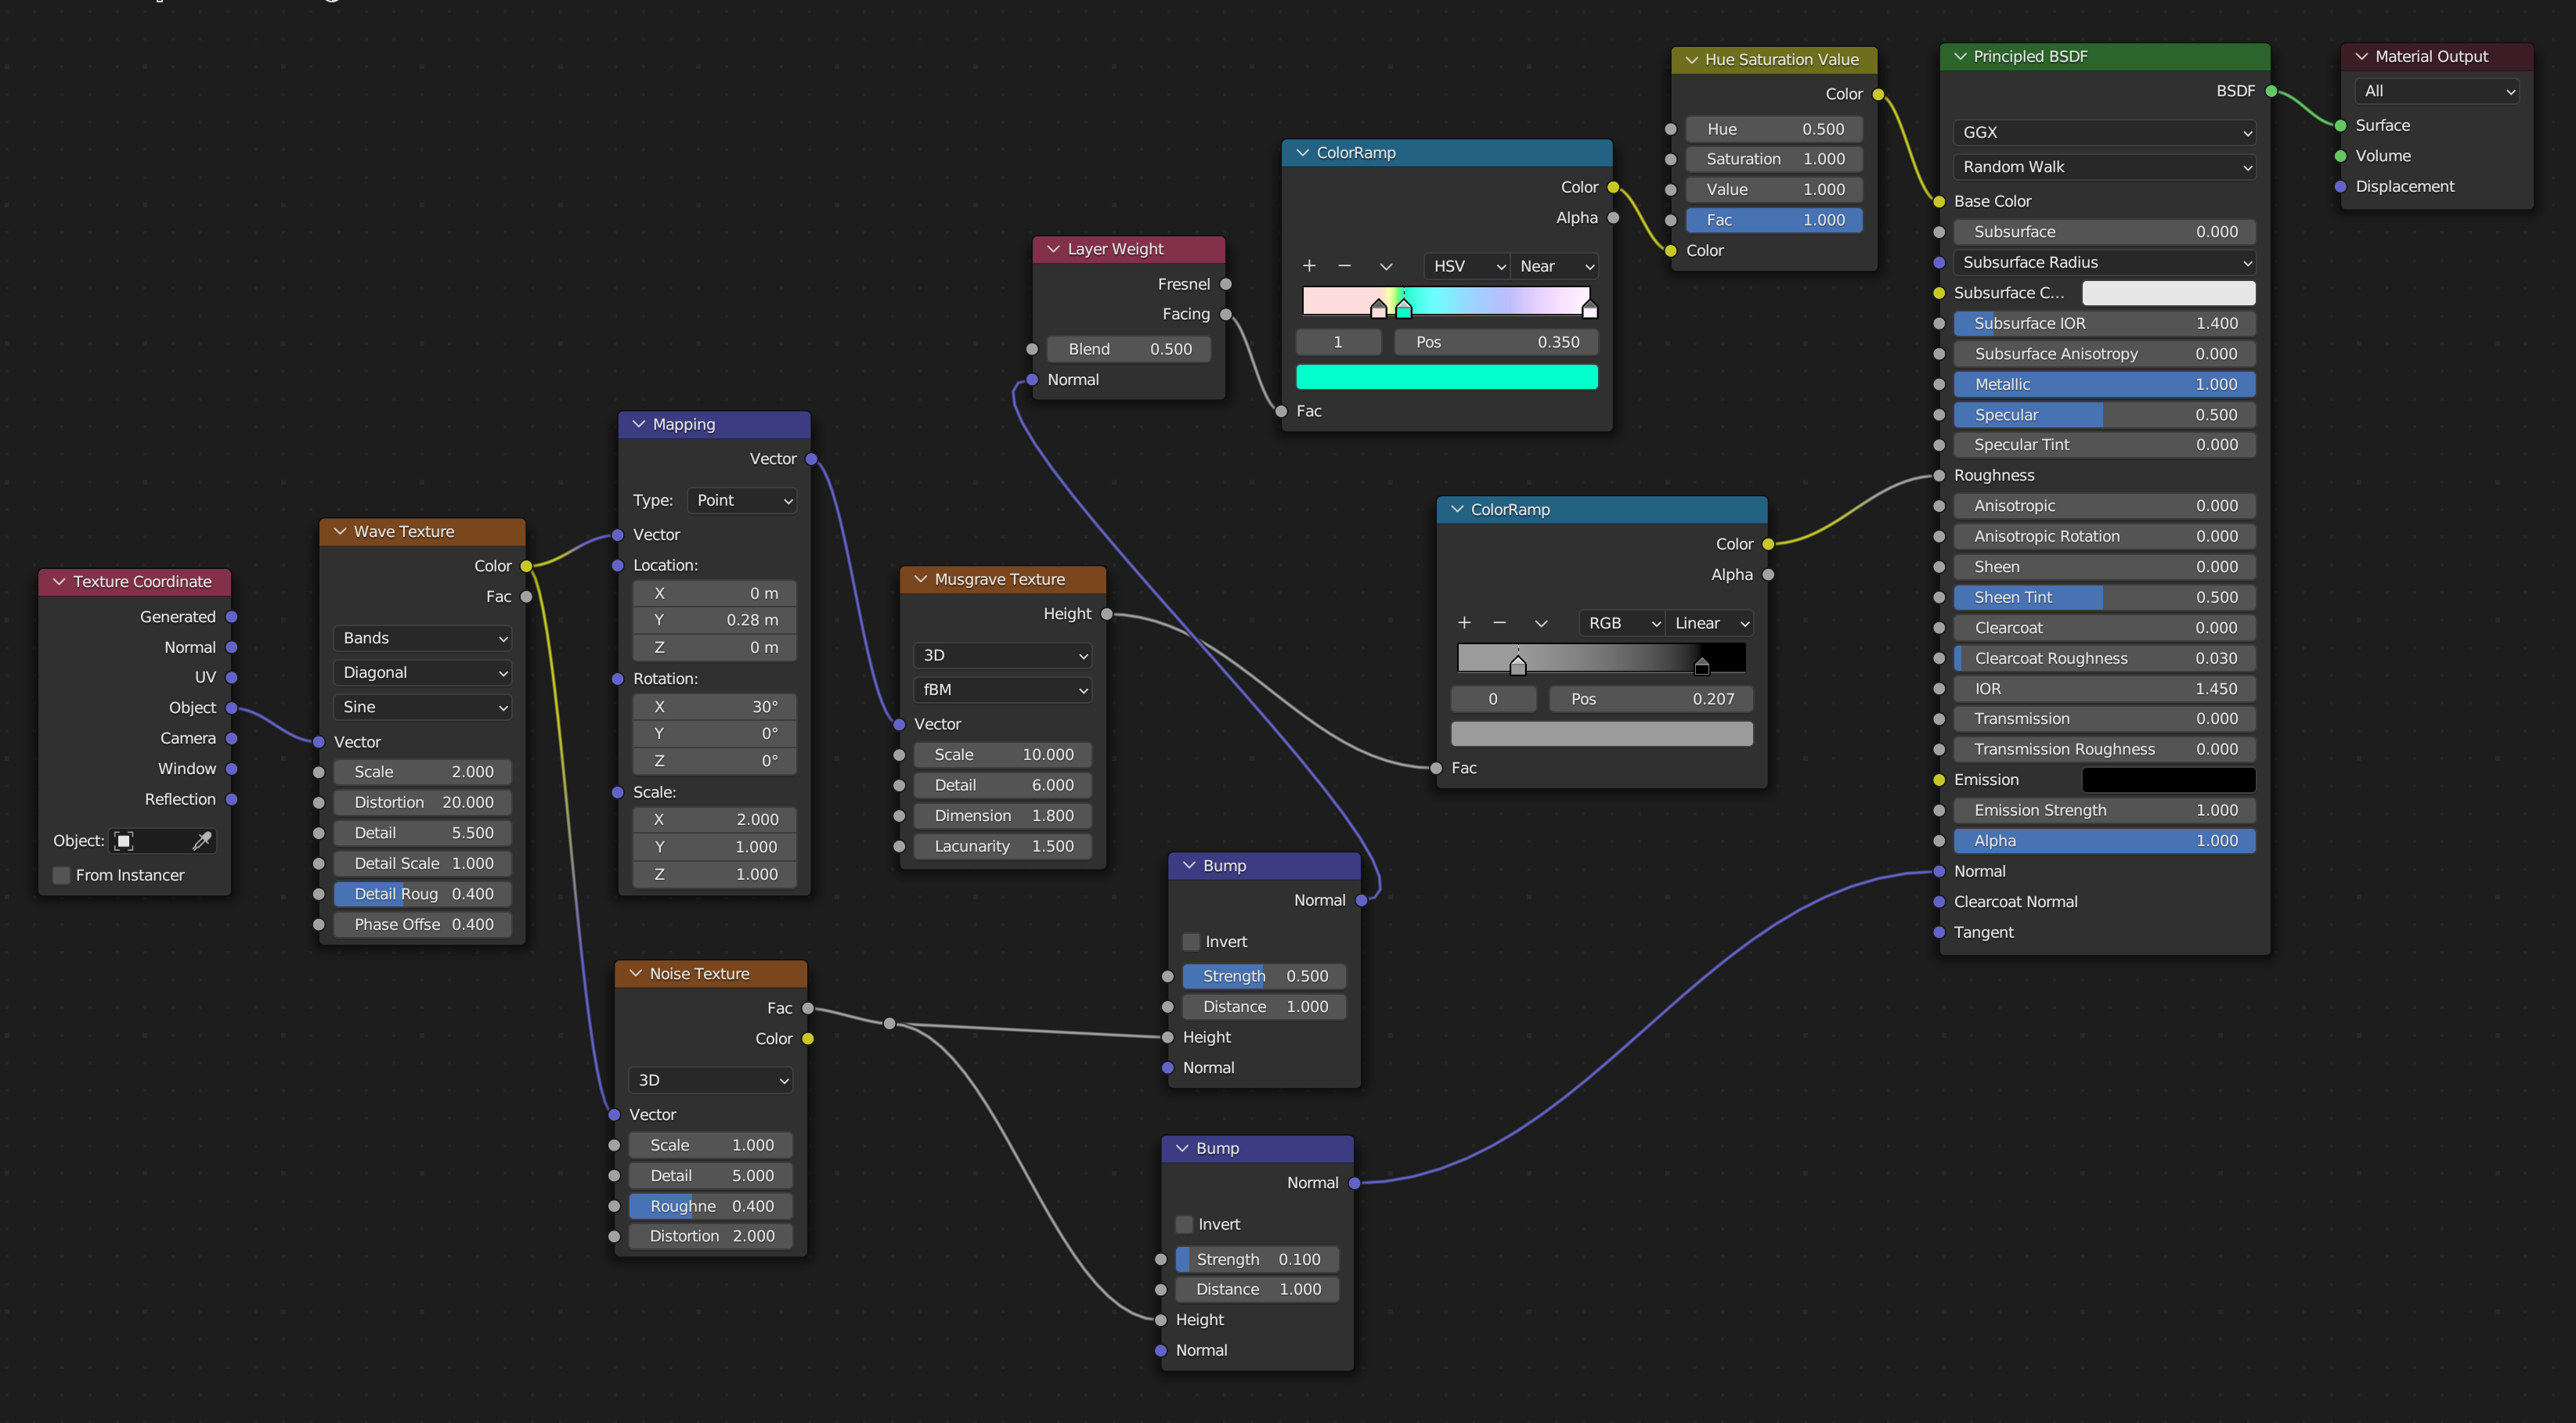
그리고 다음은 조개 껍질 비슷한 재질(Narce) 재질은 다음과 같습니다.
다음은 체스 말 중 상대적으로 가장 복잡한 나이트를 모델링하고 동일한 재질을 부여한 렌더링 결과입니다.