바로 시작할 수 있는 프로젝트 구성
git clone https://github.com/GISDEVCODE/babylonjs-with-javascript-starter.git 생성할폴더
Mesh의 Bounding Box 크기값
const getParentSize = parent => {
  const sizes = parent.getHierarchyBoundingVectors()
  const size = {
    x: sizes.max.x - sizes.min.x,
    y: sizes.max.y - sizes.min.y,
    z: sizes.max.z - sizes.min.z
  }
  return size
};
HDR, ENV를 통한 광원 및 배경
데이터 형식에 따라 코드도 달라짐. 먼저 HDR에 대한 코드는 다음과 같다.
const hdrTexture = new BABYLON.HDRCubeTexture("christmas_photo_studio_01_2k.hdr", this.#scene, 512);
this.#scene.environmentTexture = hdrTexture;
/* const skybox = */ this.#scene.createDefaultSkybox(this.#scene.environmentTexture);
// skybox.visibility = 0.1;
ENV에 대한 코드는 다음과 같다.
this.#scene.createDefaultEnvironment({
  environmentTexture: "./forest.env", // as lighting
  skyboxTexture: "./forest.env", // as background
});
매시에 대한 로컬좌표계축의 원점을 유지하고 이동
sphere.setPivotMatrix(BABYLON.Matrix.Translation(2, 2, 0), false);
여러개의 매시로 구성된 배열(meshes)를 하나의 Mesh로 만드는 코드
const singleMesh = Mesh.MergeMeshes(meshes as Mesh[], true, true, undefined, false, true);
Three.js의 Group에 대응하는 클래스는 BABYLON.TransformNode이다.
async #createModel() {
  const { meshes } = await BABYLON.SceneLoader.ImportMeshAsync("", "/", "Barrel_01_2k.gltf");

  this.#group = new BABYLON.TransformNode("group", this.#scene);
  meshes[1].parent = this.#group;
  this.#group.position.y = -0.5;
}
WebGPU 렌더러 설정
export default class App {
  #engine;
  #scene;
  #mesh;

  constructor() {
    this.#setupBabylon();
  }

  async #setupBabylon() {
    const canvas = document.querySelector("canvas");

    this.#engine = new BABYLON.WebGPUEngine(canvas, { adaptToDeviceRatio: true });
    await this.#engine.initAsync();

    this.#scene = new BABYLON.Scene(this.#engine);

    this.#createCamera();
    this.#createLight();
    this.#createModel();
    this.#setupEvents();
  }

  ...
기본적으로 사용하는 좌표계는 왼손 좌표계이다. 하지만 오른손 좌표계로의 전환도 가능한데 아래의 코드를 실행해 주면 바로 오른손 좌표계로 전환되어 이를 기준으로 개발이 가능하다.
scene.useRightHandedSystem = true;
glTF 형식 등을 가져오기 위해 설치해야할 패키지
npm i babylonjs-loaders
import "babylonjs-loaders"

..

  #createModel() {
    BABYLON.SceneLoader.ImportMeshAsync(
      "",
      "https://assets.babylonjs.com/meshes/", "both_houses_scene.babylon").then((result) => {
        const house1 = this.#scene.getMeshByName("detached_house");
        house1.position.y = 2;
        const house2 = result.meshes[2];
        house2.position.y = 1;
      }
    );

    BABYLON.SceneLoader.ImportMesh("",
      Assets.meshes.Yeti.rootUrl, Assets.meshes.Yeti.filename,
      this.#scene,
      (meshes) => {
        meshes[0].scaling = new BABYLON.Vector3(0.1, 0.1, 0.1);
      }
    );
  }
위 코드에서 Assets은 다음 코드가 필요함
<script src="https://assets.babylonjs.com/generated/Assets.js"></script>
도 단위를 라디언 단위로 변경해주는 API
BABYLON.Tools.ToRadians(45);
물리엔진 하복(Havok)을 사용하기 위해서는 먼저 @babylonjs/havok를 설치하고 node_modules/@babylonjs/havok/lib/esm/HavokPhysics.wasm 파일을 node_modules/.vite/deps 경로에 복사해 두어야 한다. 아래는 코드예시이다.
import * as BABYLON from "babylonjs"
import HavokPhysics from "@babylonjs/havok";

export default class App {
  #engine;
  #scene;

  constructor() {
    const canvas = document.querySelector("canvas");
    this.#engine = new BABYLON.Engine(canvas, true, { adaptToDeviceRatio: true });
    this.#scene = new BABYLON.Scene(this.#engine);

    this.#createCamera();
    this.#createLight();
    this.#createModel();
    this.#setupEvents();
  }

  #createLight() {
    this.#scene.createDefaultLight();
  }

  #createCamera() {
    this.#scene.createDefaultCamera(true, false, true);
    const camera = this.#scene.cameras[0];
    camera.position = new BABYLON.Vector3(4, 4, 10);
  }

  async #createModel() {
    const sphere = BABYLON.MeshBuilder.CreateSphere("sphere", { diameter: 2, segments: 32 }, this.#scene);
    sphere.position.y = 4;

    const ground = BABYLON.MeshBuilder.CreateGround("ground", { width: 10, height: 10 }, this.#scene);

    const havokInstance = await HavokPhysics();
    const hk = new BABYLON.HavokPlugin(true, havokInstance);
    this.#scene.enablePhysics(new BABYLON.Vector3(0, -9.8, 0), hk);

    const sphereAggregate = new BABYLON.PhysicsAggregate(
      sphere, BABYLON.PhysicsShapeType.SPHERE,
      { mass: 1, restitution: 0.75 }, this.#scene
    );

    const groundAggregate = new BABYLON.PhysicsAggregate(
      ground, BABYLON.PhysicsShapeType.BOX,
      { mass: 0 }, this.#scene
    );

    const viewer = new BABYLON.Debug.PhysicsViewer(this.#scene);
    for (const mesh of this.#scene.meshes) {
      if (mesh.physicsBody) {
        viewer.showBody(mesh.physicsBody);
      }
    }
  }

  #setupEvents() {
    window.addEventListener("resize", this.#resize.bind(this));
    this.#scene.registerBeforeRender(this.update.bind(this));
    this.#engine.runRenderLoop(this.render.bind(this))
  }

  update({ deltaTime }) {

  }

  render() {
    this.#scene.render();
  }

  #resize() {
    this.#engine.resize();
  }
}
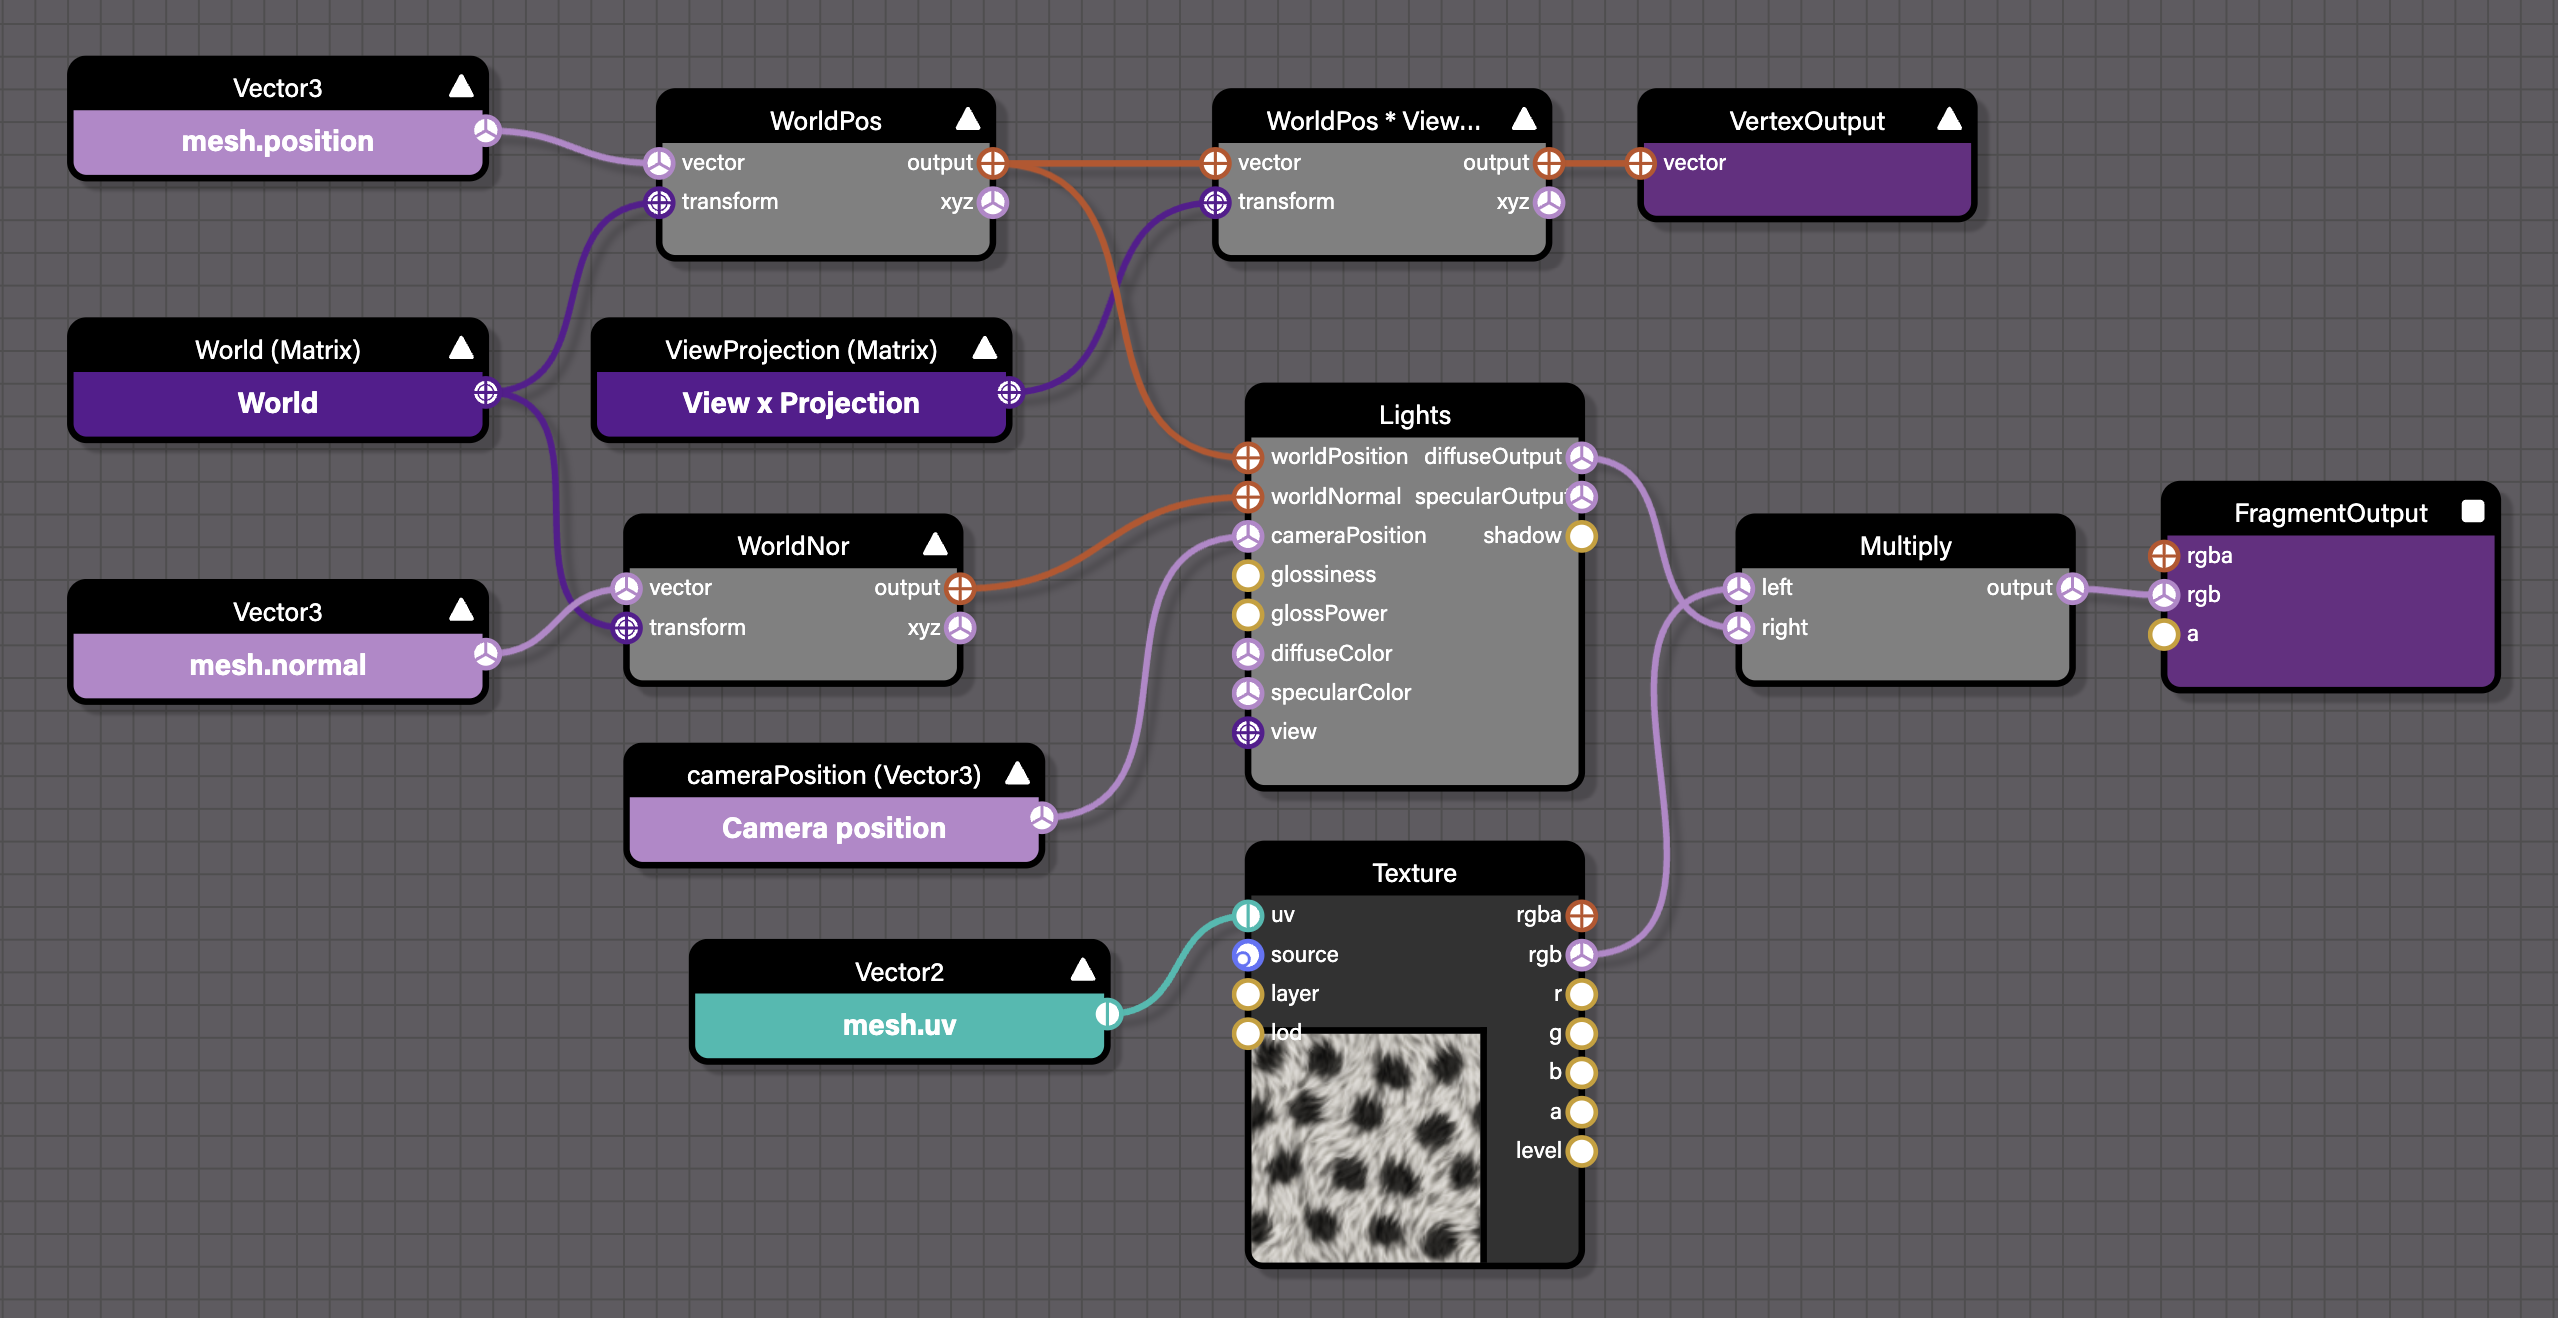
Node Material Editor 예
위의 결과를 JSON으로 저장할 수 있으며 코드를 통해 사용하는 예는 아래와 같다.
BABYLON.NodeMaterial.ParseFromFileAsync("nodeMat", "./nodeMaterial.json", this.#scene).then((mat) => {
  this.#mesh.material = mat;
});
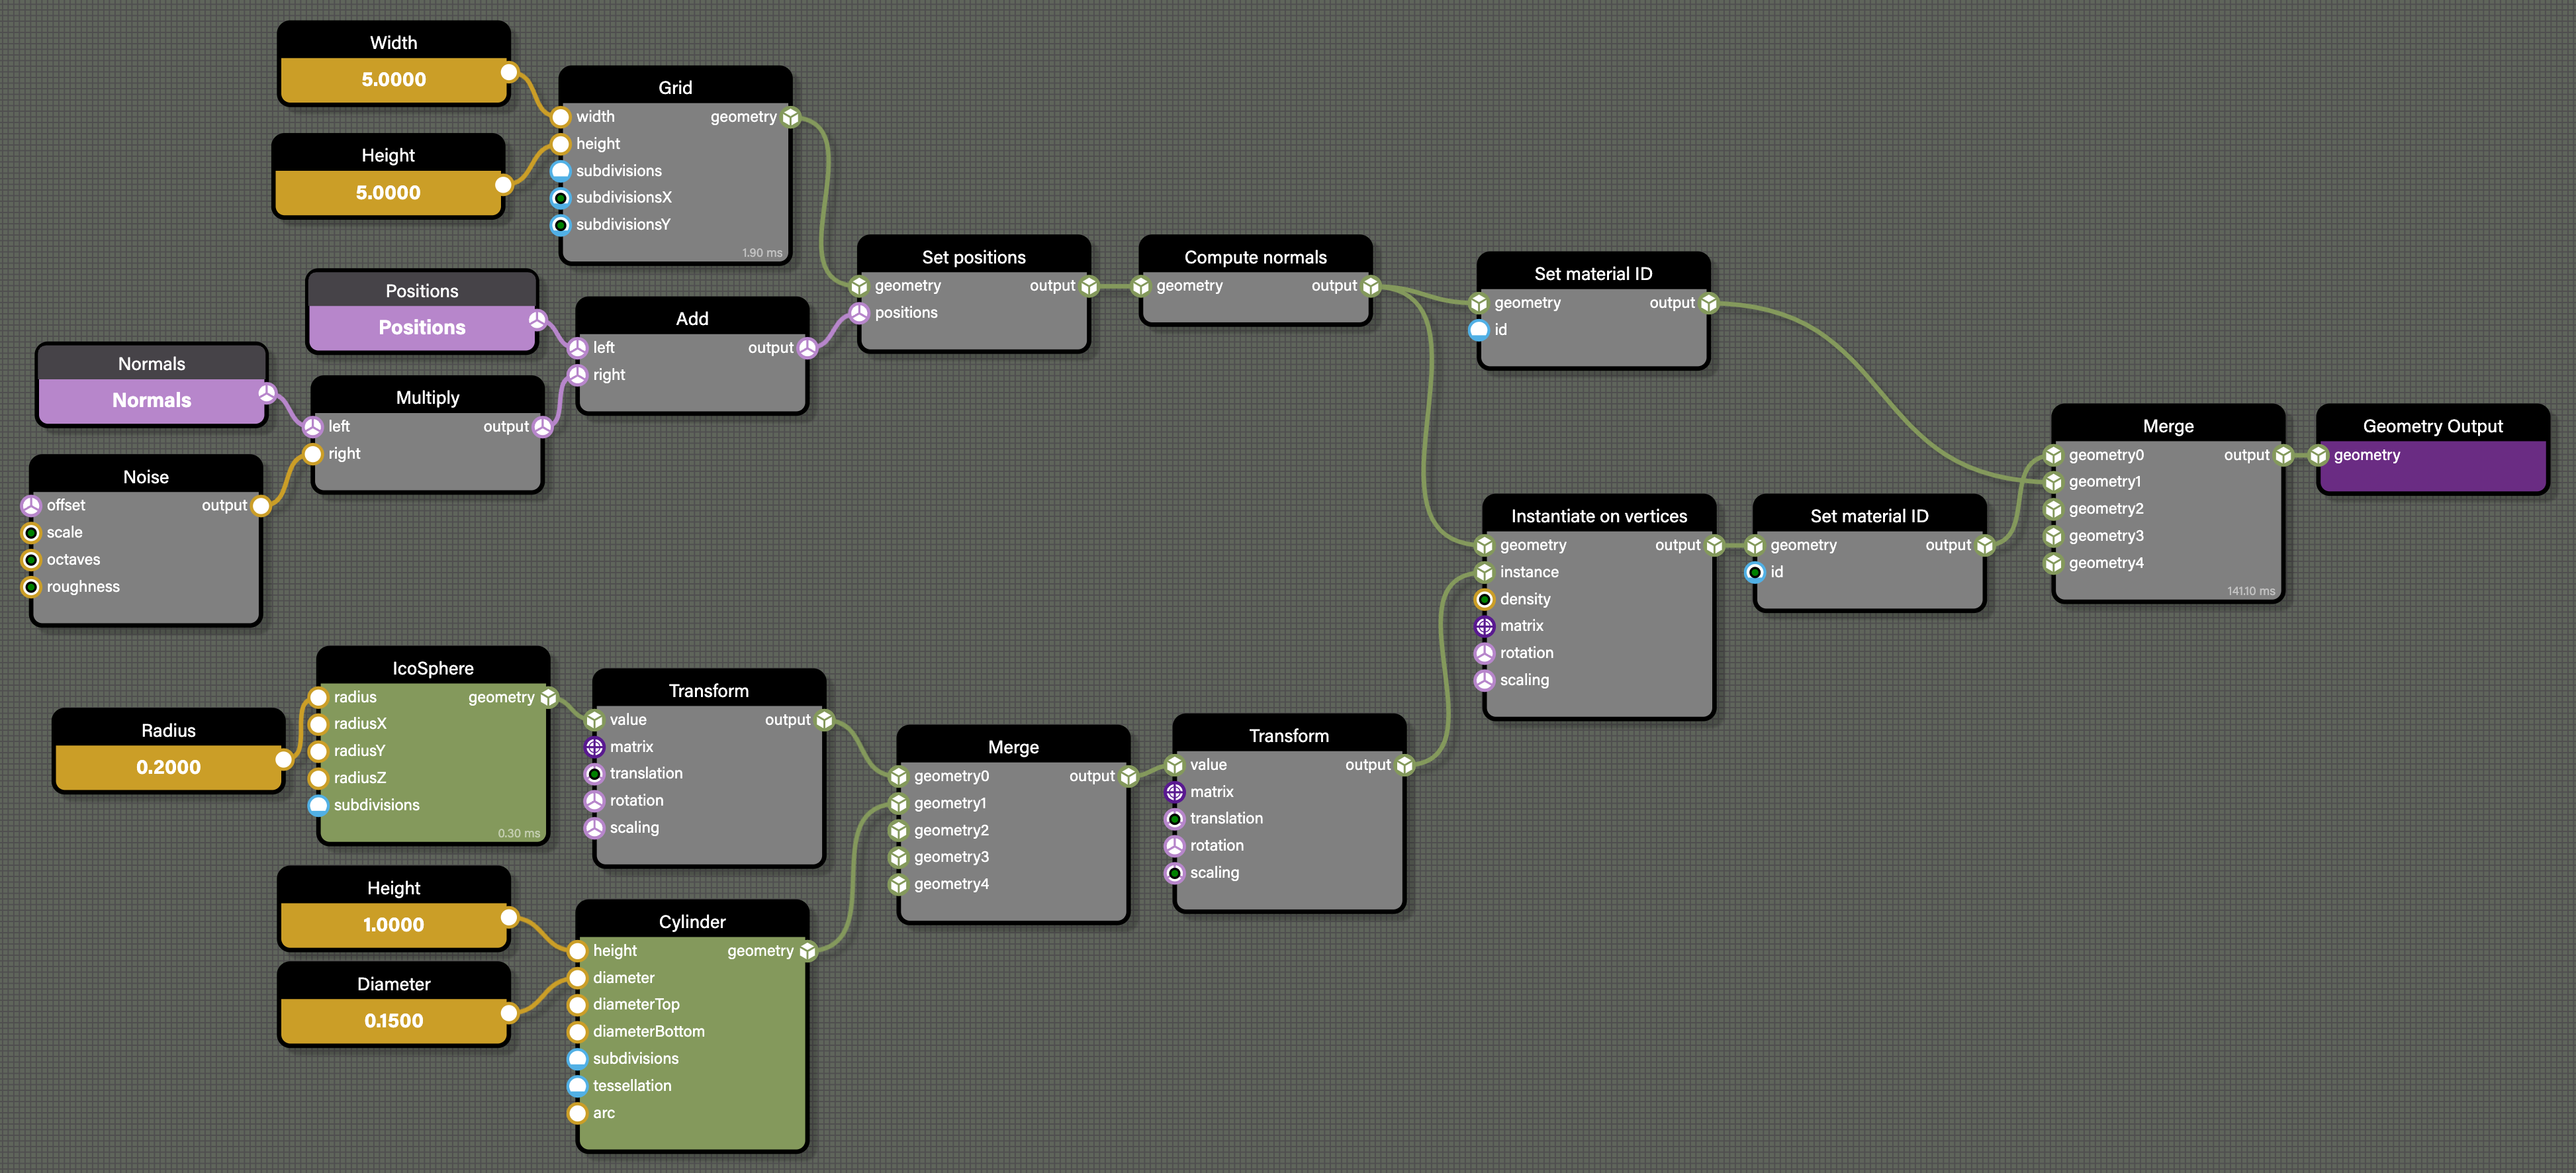
Node Geometry Editor 예
위의 결과를 JSON으로 저장할 수 있으며 코드를 통해 사용하는 예는 아래와 같다.
#createModel() {
  const assetsManager = new BABYLON.AssetsManager(this.#scene);
  const nodeGeometryFile = assetsManager.addTextFileTask("file", "./nodeGeometry.json");
  assetsManager.load();

  assetsManager.onFinish = async (tasks) => {
    const nodeGeometryJSON = JSON.parse(nodeGeometryFile.text);
    const nodeGeometry = await BABYLON.NodeGeometry.Parse(nodeGeometryJSON);
    nodeGeometry.build();
    /* const myGeometry = */ nodeGeometry.createMesh("myGeometry");
  }
}
ArcRotateCamera의 마우스 휠 줌 기능 비활성화
this.#scene.createDefaultCamera(true, false, true);
const camera = this.#scene.cameras[0];
camera.inputs.removeByType("ArcRotateCameraMouseWheelInput");
scene을 구성하는 mesh를 제거하기 위해서는 dispose 매서드를 호출
const meshes = this.#scene.getMeshesById("cannon");
meshes[0].dispose();
사용할 카메라 선택하기
this.#scene.activeCamera = myCamera;
this.#scene.activeCamera.attachControl(true);

// 위의 코드는 다음 한줄로 대체가능함
myCamera.attachControl(true);
앞면 뒷면 모두 렌더링하기
방법은 2가지 인데 매시에 대해서 sideOrientation: BABYLON.Mesh.DOUBLESIDE를 지정하는 것, 또는 재질의 backFaceCulling = false로 지정하는 것으로 가능함
const plane = BABYLON.MeshBuilder.CreatePlane("wall", { size: 10, sideOrientation: BABYLON.Mesh.DOUBLESIDE }, this.#scene);
const planeMaterial = new BABYLON.StandardMaterial("planeMat", this.#scene);
planeMaterial.backFaceCulling = false;
plane.material = planeMaterial;


